
Onigiri, or Japanese rice balls, are a popular and versatile snack in Japan. They are simple to make and can be filled with a variety of ingredients, making them perfect for a quick meal or a lunchbox treat. The combination of seasoned rice and flavorful fillings wrapped in nori creates a delightful taste and texture experience.
When preparing onigiri, you may need to visit a specialty store for certain ingredients. Japanese short-grain rice is essential for the right texture and stickiness. Nori sheets, which are dried seaweed, are also a key component. Fillings like pickled plum (umeboshi) might not be common in every household but can be found in Asian supermarkets.
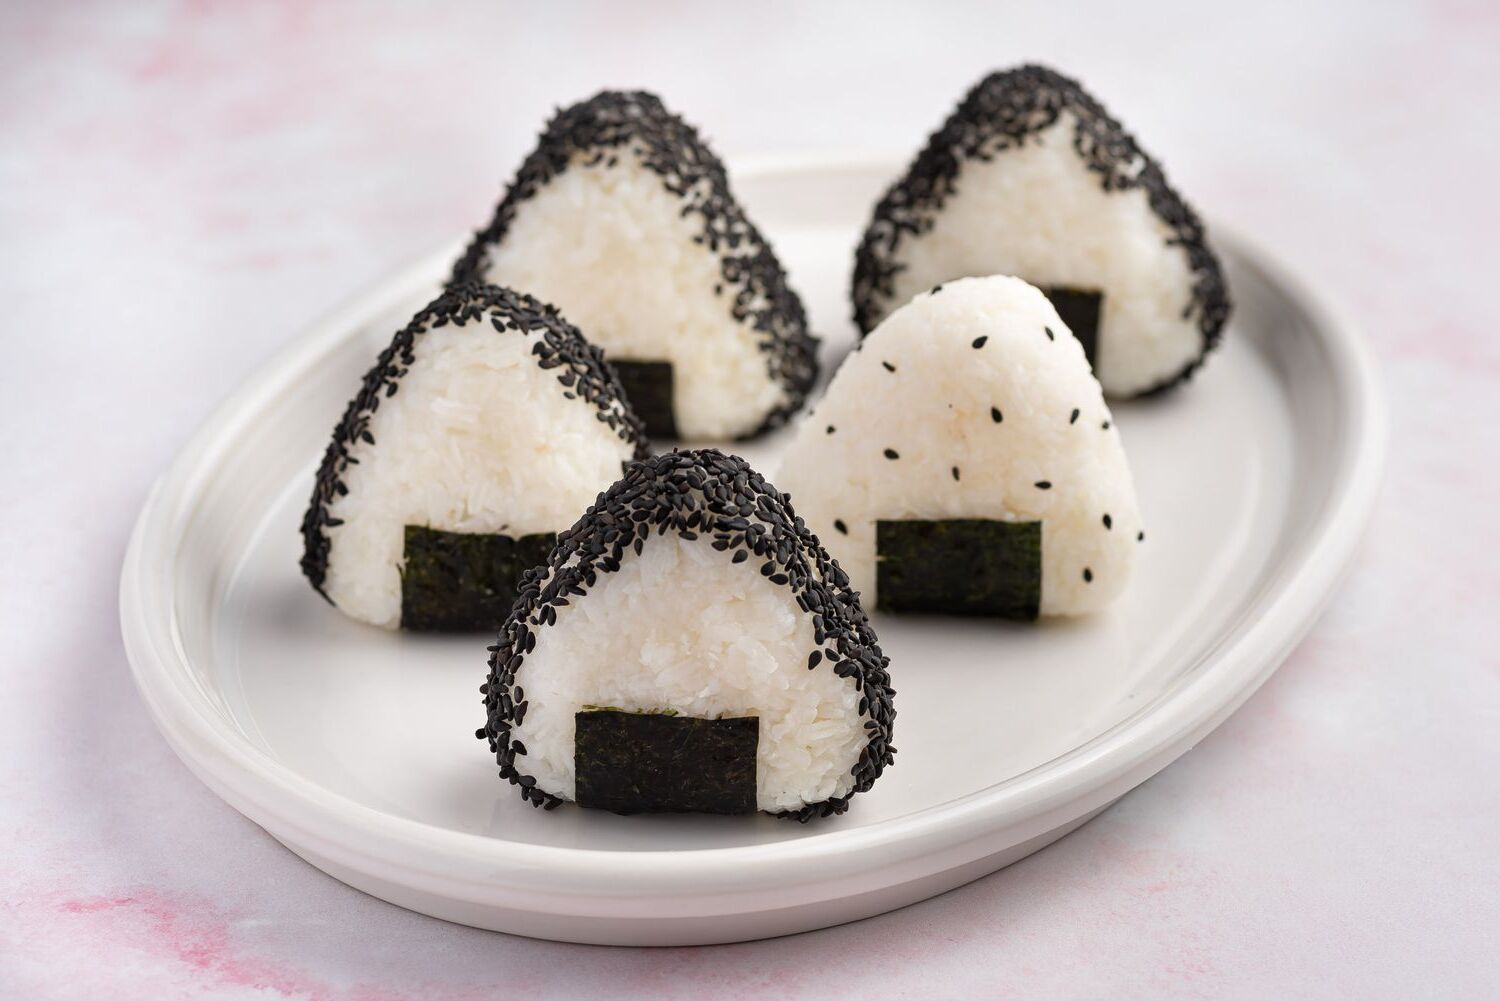
Ingredients For Onigiri Japanese Rice Balls Recipe
Japanese short-grain rice: This type of rice is sticky and holds together well, making it ideal for forming rice balls.
Water: Used to cook the rice.
Salt: Adds flavor to the rice and helps season your hands to prevent sticking.
Nori: Dried seaweed sheets that wrap around the rice balls, adding a savory flavor and texture.
Filling of choice: Common fillings include tuna, salmon, or pickled plum, adding a burst of flavor to the rice balls.
Technique Tip for Making Onigiri
When forming the onigiri, make sure to wet your hands frequently to prevent the rice from sticking. Additionally, using a light touch when shaping the rice balls will help maintain the delicate texture of the short-grain rice. If you find the nori becoming too soft, consider wrapping it just before serving to maintain its crispiness.
Suggested Side Dishes
Alternative Ingredients
Japanese short-grain rice - Substitute with sushi rice: Sushi rice is also a type of short-grain rice and has a similar sticky texture, making it a suitable substitute for onigiri.
Japanese short-grain rice - Substitute with arborio rice: Arborio rice, commonly used in risotto, has a similar starchy and sticky quality, which can work in a pinch for onigiri.
Water - Substitute with dashi broth: Using dashi broth instead of water can add a depth of umami flavor to the rice, enhancing the overall taste of the onigiri.
Salt - Substitute with soy sauce: Soy sauce can add a savory and slightly salty flavor, providing a different but delicious seasoning for the rice.
Nori (seaweed) - Substitute with rice paper: Rice paper can be used as a wrap for onigiri, offering a different texture while still keeping the rice ball intact.
Nori (seaweed) - Substitute with shiso leaves: Shiso leaves provide a fresh and aromatic alternative to nori, adding a unique flavor to the onigiri.
Tuna - Substitute with canned chicken: Canned chicken can be used as a filling, offering a similar texture and protein content to tuna.
Salmon - Substitute with smoked trout: Smoked trout has a similar flavor profile and texture to smoked salmon, making it a good alternative for onigiri filling.
Pickled plum - Substitute with pickled radish: Pickled radish, also known as takuan, provides a similar tangy and crunchy element, making it a suitable substitute for pickled plum.
Alternative Recipes Similar to Onigiri
How to Store or Freeze Onigiri
Allow the onigiri to cool completely at room temperature before storing. This helps prevent condensation, which can make the rice soggy.
Wrap each onigiri individually in plastic wrap or place them in an airtight container to maintain freshness and prevent them from drying out.
Store the wrapped onigiri in the refrigerator if you plan to consume them within 1-2 days. For longer storage, freezing is recommended.
To freeze, place the wrapped onigiri in a single layer on a baking sheet and freeze until solid. Once frozen, transfer them to a freezer-safe bag or container to save space.
When ready to eat, thaw the onigiri in the refrigerator overnight or use a microwave. If using a microwave, remove the plastic wrap and wrap the onigiri in a damp paper towel to prevent the rice from drying out. Heat on medium power for 1-2 minutes or until warmed through.
For best results, consume frozen onigiri within one month to ensure optimal taste and texture.
If using fillings like tuna or salmon, be mindful of their shelf life. Fresh fillings should be consumed within a day or two, while cooked or preserved fillings can last longer.
Avoid storing onigiri with nori already wrapped around them if you plan to refrigerate or freeze. The nori can become soggy. Instead, wrap the nori around the onigiri just before serving for the best texture.
How to Reheat Leftovers
Microwave Method:
- Place the onigiri on a microwave-safe plate.
- Cover it with a damp paper towel to prevent it from drying out.
- Heat on medium power for 1-2 minutes, checking halfway to ensure it’s evenly warmed.
- Let it sit for a minute before enjoying.
Steaming Method:
- Set up a steamer and bring the water to a boil.
- Place the onigiri in the steamer basket, ensuring they are not touching each other.
- Steam for about 5-7 minutes or until heated through.
- Carefully remove and let cool slightly before serving.
Pan-Frying Method:
- Heat a non-stick pan over medium heat and add a small amount of sesame oil or vegetable oil.
- Place the onigiri in the pan and cook for 2-3 minutes on each side until the exterior is crispy and the inside is warm.
- Remove from the pan and let cool slightly before eating.
Oven Method:
- Preheat your oven to 350°F (175°C).
- Wrap each onigiri in aluminum foil to keep them moist.
- Place them on a baking sheet and bake for 10-15 minutes.
- Carefully unwrap and let cool slightly before serving.
Air Fryer Method:
- Preheat the air fryer to 350°F (175°C).
- Lightly spray the onigiri with cooking spray to prevent sticking.
- Place them in the air fryer basket, ensuring they are not crowded.
- Heat for 5-7 minutes, shaking the basket halfway through to ensure even heating.
- Let cool slightly before enjoying.
Essential Tools for Making Onigiri
Rice cooker: Essential for perfectly cooking the Japanese short-grain rice to the right texture.
Measuring cups: Used to measure the precise amount of rice and water needed for the recipe.
Strainer: Helps in rinsing the rice under cold water until the water runs clear.
Mixing bowl: Useful for holding the rinsed rice before transferring it to the rice cooker.
Wooden spoon: Ideal for fluffing the cooked rice without crushing the grains.
Cutting board: Provides a clean surface for cutting the nori into strips.
Sharp knife: Necessary for cutting the nori sheets into strips.
Small bowl: Holds water for wetting your hands to prevent the rice from sticking.
Salt shaker: Used to sprinkle salt on your wet hands before shaping the rice balls.
Serving plate: A clean surface to place the finished onigiri before serving.
Time-Saving Tips for Making Onigiri
Prepare the filling: Have your filling ready before you start making the onigiri. This saves time during assembly.
Use a rice cooker: A rice cooker ensures perfectly cooked rice without constant monitoring.
Wet hands: Keep a bowl of water nearby to wet your hands frequently. This prevents the rice from sticking to your hands.
Batch process: Shape multiple rice balls at once before adding the filling to streamline the process.
Pre-cut nori: Cut the nori strips in advance to save time during assembly.
Onigiri Japanese Rice Balls Recipe
Ingredients
Main Ingredients
- 2 cups Japanese short-grain rice
- 2.5 cups Water
- 1 teaspoon Salt
- 4 sheets Nori (seaweed) cut into strips
- 1 cup Filling of choice (e.g., tuna, salmon, pickled plum)
Instructions
- 1. Rinse the rice under cold water until the water runs clear.
- 2. Combine the rice and water in a rice cooker and cook according to the manufacturer's instructions.
- 3. Once the rice is cooked, let it cool slightly.
- 4. Wet your hands with water and sprinkle them with salt. Take a handful of rice and form it into a ball or triangle shape.
- 5. Make a small indentation in the center of the rice ball and place your filling inside. Cover the filling with more rice and reshape if necessary.
- 6. Wrap a strip of nori around the rice ball. Repeat with the remaining rice and filling.
Nutritional Value
Keywords
More Amazing Recipes to Try 🙂
- Cilantro Lime Dressing Recipe10 Minutes
- Sausage Hash Brown Breakfast Casserole Recipe1 Hours
- Cajun Chicken and Sausage Gumbo Recipe1 Hours 20 Minutes
- White Peachy Sangria Recipe10 Minutes
- Slow Cooker Pot Roast Recipe8 Hours 15 Minutes
- Greek Yogurt Ranch Salad Dressing Recipe10 Minutes
- Crab Legs with Garlic Butter Sauce Recipe25 Minutes
- Zucchini Fritters Recipe25 Minutes
Leave a Reply